How to migrate a VM from KVM to Proxmox
This tutorial will explain how you can transfer a virtual machine from kvm to proxmox without losing any data or configurations. You will have at the end a clone of a KVM virtual machine in your proxmox.
What do you need for this tutorial?
- Access to the machine where the KVM is running.
- Access to the Proxmox web interface.
- Basic knowledge of using the command line.
Virsh on KVM
virsh is a command-line utility for managing and interacting with virtual machines (VMs) and hypervisors. It is commonly used in environments utilizing the KVM (Kernel-based Virtual Machine) hypervisor. With virsh, you can perform various operations such as starting, stopping, and inspecting VMs, as well as managing storage and network configurations.
What will we do?
First, we will locate the VM files on KVM and transfer them to Proxmox with scp command (you can use any other method you want). Next, we’ll create a new default VM on Proxmox and import the transferred KVM VM files into the created Proxmox VM. Finally, we’ll adjust the boot order of the Proxmox VM to boot from the KVM VM files.
Step 1: Shutdown the KVM Machine
- Log into the machine where the KVM is running (physically or through ssh).
- List all the virtual machines
sudo virsh list --all
- Shut down the machine you want to transfer:
sudo virsh shutdown <machine_name>
Step 2: Locate and Copy the VM Disk File
- Find the path to the related files we need on KVM for your VM (e.g.
.qcowfiles and.isofiles). To know the exact path of those files you can run this command:
virsh domblklist <machine_name>
- Copy the path of those files and keep that somewhere you can find them
- Log into your PROXMOX machine and open the terminal there
- Copy all the files from the KVM machines to the proxmox machine (all
.qcowfiles,.isofiles, etc). Use the path from the last command. We will copy the files with this command on the proxmox machine (usually to/var/lib/vz/images):
scp root@hostname:<path_to_the_.qcow_file> /var/lib/vz/images
Step 3: Import the VM Disk into Proxmox
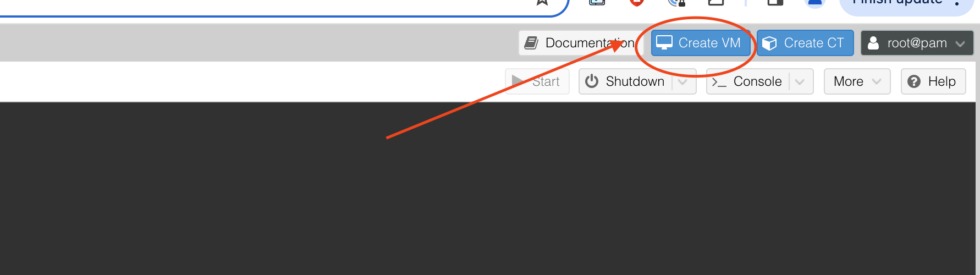
- Log into the Proxmox web interface
- Create a new VM in the web interface (leave other settings as default)
- Import the disk into Proxmox with the terminal and the machine ID of the one you created:
qm importdisk <machine_id_number> /var/lib/vz/images/file.qcow local
Note: Replace local with the storage you wish.
- Rescan the imported disk:
qm rescan
Step 4: Configure the VM in Proxmox
- Go to your new created VM from the proxmox web interface.
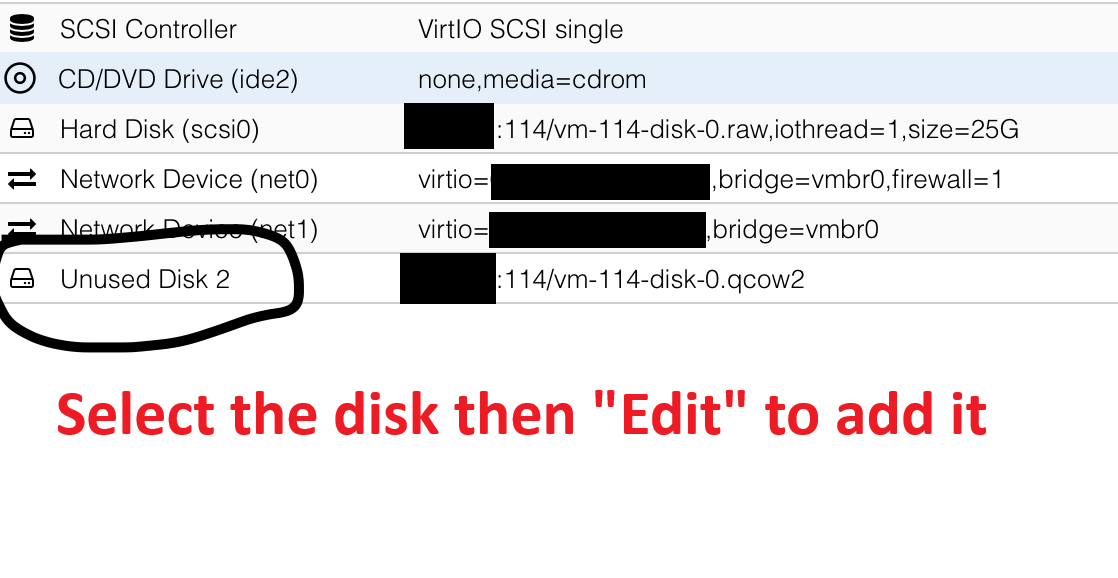
- Go to the Hardware section of the newly created VM in the Proxmox web interface
- Look for the Unused Disk and select it.
- Then you have to add the disk by clicking on Edit on the top.

- Detach the old disk if necessary (optional)
- Go to the Options section and adjust the boot order as needed (Drag the disk you added to the top).

By following these steps, you should be able to successfully transfer your VM from KVM to Proxmox. Make sure to verify the settings and configurations after the transfer to ensure everything works correctly.