Install Docker natively on Android Phone and use it as a Home Server
In this tutorial, we will guide you through the process of installing Docker on your Android phone, specifically using a OnePlus 6T with postmarketOS (Video Demo). I also wrote another blog post explaining how you can run this phone without a battery, allowing it to run forever as long as it remains connected to a power source. If you’re interested, feel free to check it out! This guide can be adapted only for phones on the postmarketOS device list. Please note that this process will erase all data on your phone, so it’s important to use a device you don’t need. Let’s get started!
What do you need for this tutorial?
- An Android phone (OnePlus 6 or OnePlus 6T is recommended)
- Fastboot installed on your PC (see step 2)
- PostmarketOS boot and img files (see step 3)
Step 1: Enable Developer Mode and USB Debugging
Enable Developer Mode and USB Debugging Start by activating Developer Mode on your Android phone.
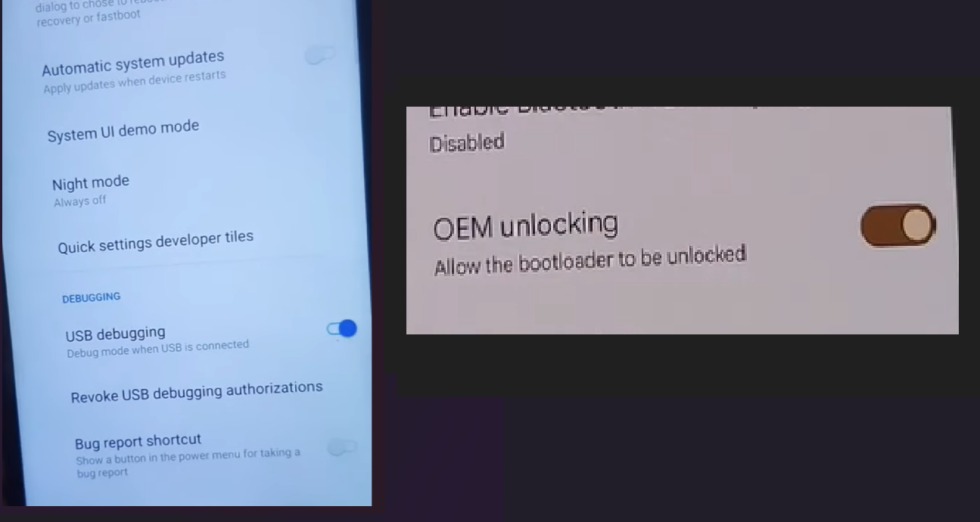
Go to Settings, tap on “Build number” repeatedly until you see a message indicating that Developer Mode has been enabled. Then, go to Developer options and activate OEM unlocking and USB debugging.
Step 2: Install Fastboot on your PC
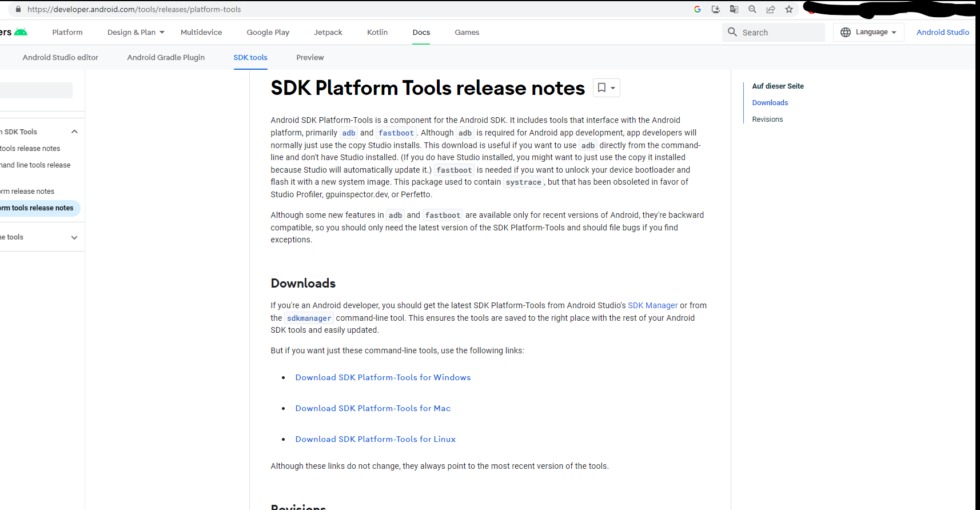
Install Fastboot on your PC To proceed with the installation, you’ll need to have Fastboot installed on your PC. Visit the official Android SDK Platform Tools page and download the package. Extract the files and add the platform-tools folder to your system’s environment variables (instructions vary depending on your operating system).
Step 3: Download PostmarketOS Files
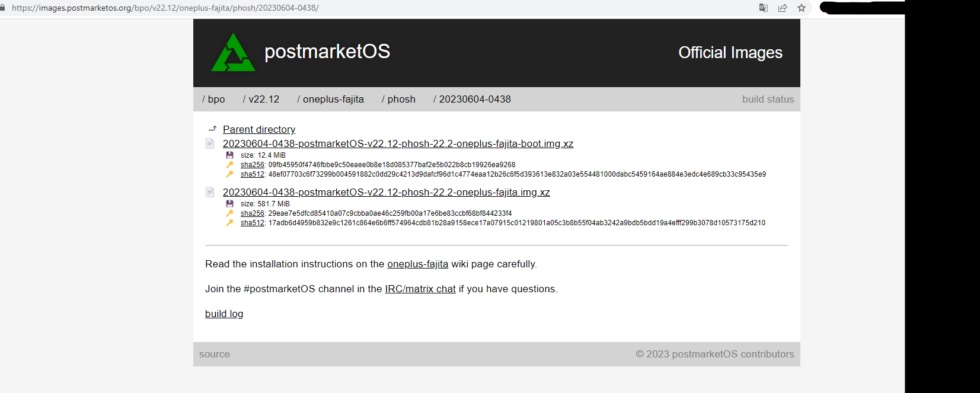
Download the PostmarketOS boot and img files for your specific phone model. Visit the postmarketOS website, locate the appropriate files (I am using phosh 22.12), and download them. Extract the files and place them in a single folder for easy access.
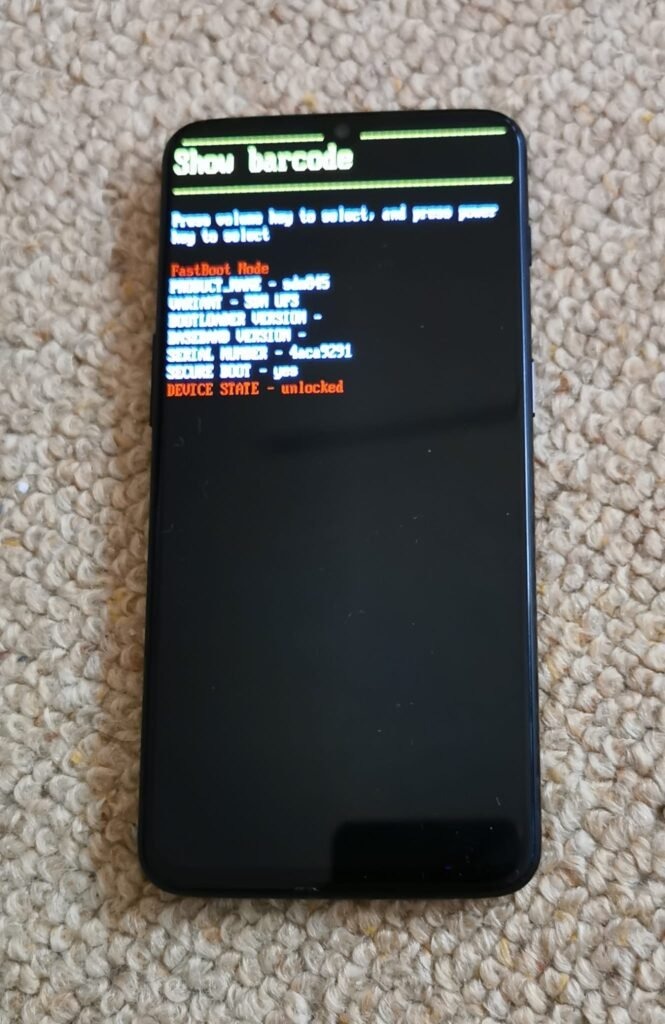
Step 4: Enter Fastboot Mode
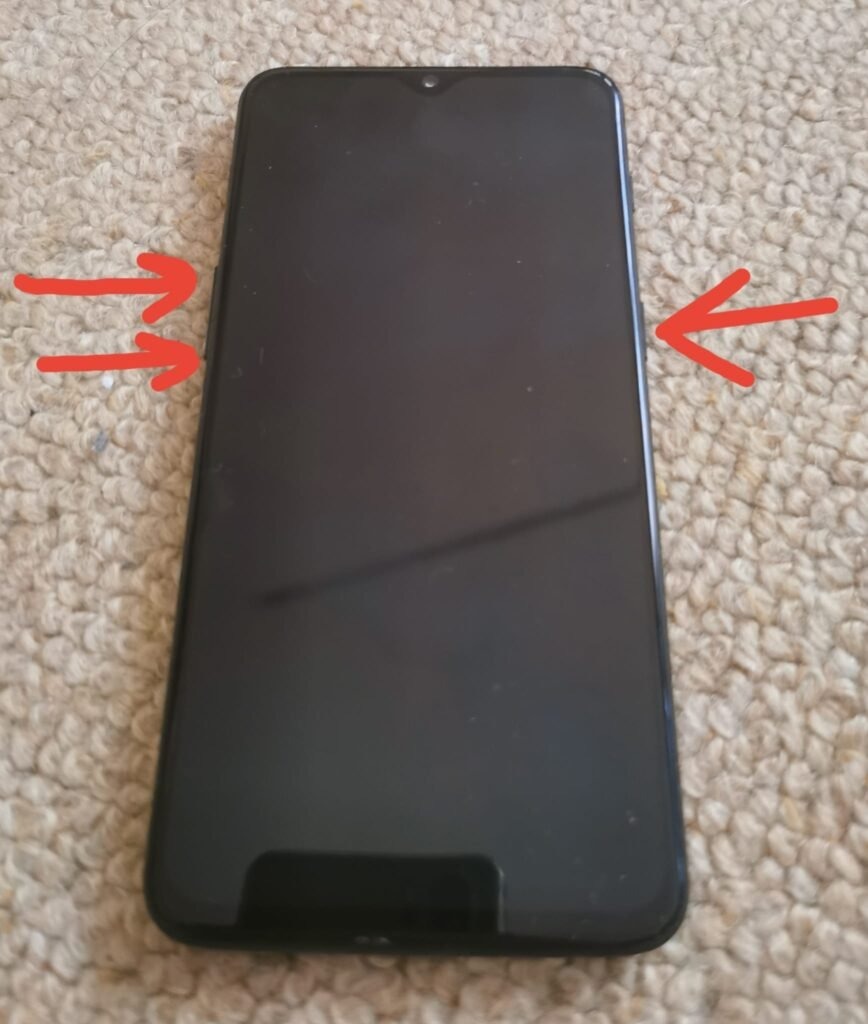
Restart your Android phone and boot it into Fastboot mode. This can typically be done by pressing the volume up, volume down, and power buttons simultaneously on Oneplus 6t. Once your phone is in Fastboot mode, connect it to your PC using a USB cable.
Step 5: Flash PostmarketOS
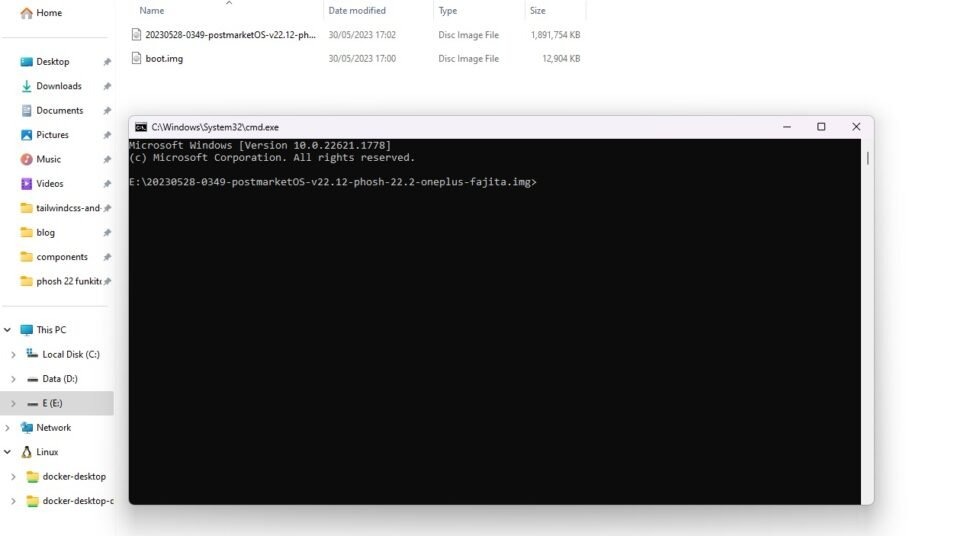
Be aware that each device has its own specific guide for installing PostmarketOS (they are mostly similar). Make sure to carefully read and follow the instructions for your specific phone model on the postmarketOS website before flashing the system. This guide is for oneplus 6t. Flash PostmarketOS on Your Phone by opening a command prompt or terminal window on your PC and navigate to the folder where you saved the PostmarketOS files. Execute the following commands one by one:
fastboot erase userdata
fastboot erase dtbo
fastboot flash boot boot_file_name.img
fastboot flash userdata img_file_name.img
Replace “boot_file_name” and “img_file_name” with the actual file names you saved earlier. Once the flashing process is complete, restart your phone.
PostmarketOS ist installed now on your phone!
Step 6: Initial Setup and SSH Activation
When your phone restarts, you may be prompted for a PIN.
Use the default PIN, which is usually “147147.” Connect your phone to a Wi-Fi network.
If you are installing newer version of Postmarketos, you may need to use systemd. PostmarketOS is now using systemd across most of its official images (Read more in the official post!).
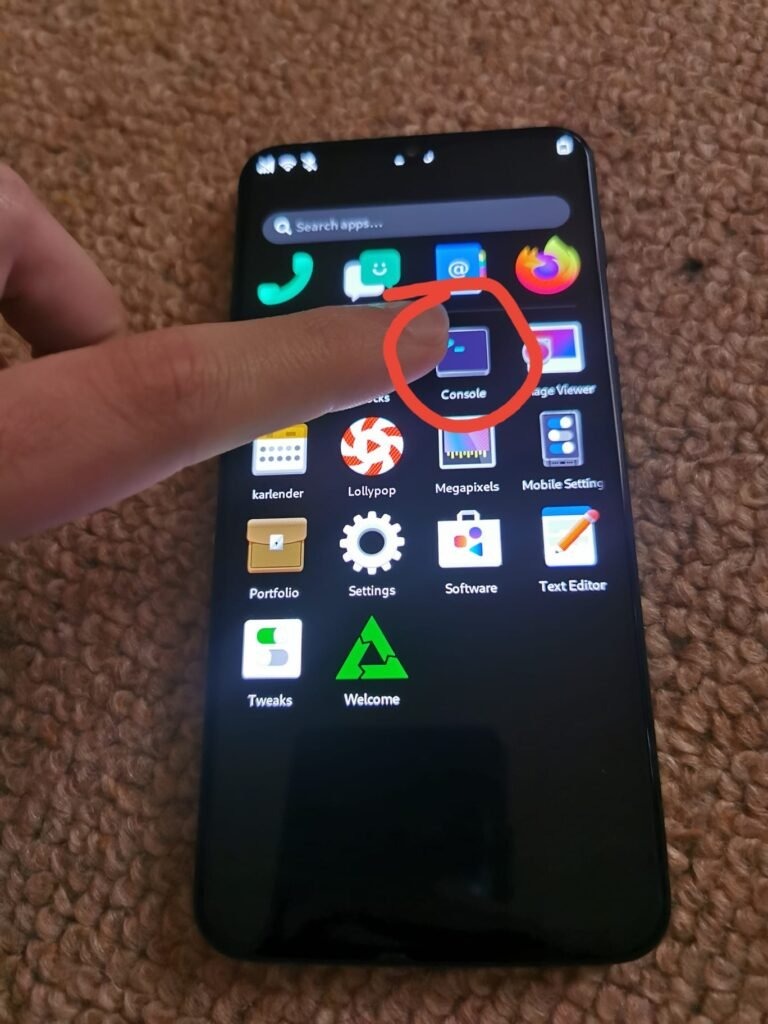
Open the Console app on your phone and activate SSH to control the phone from your PC. Run the following commands in the Console app on your phone to activate SSH:
sudo apk update
sudo service sshd start
sudo rc-update add sshd
For the newer versions of Postmarketos you may need to run those commands instead the ones before:
  sudo systemctl start sshd
sudo systemctl enable sshd
sudo systemctl status sshd
Step 7: Connect to Your Phone via SSH on your PC
On your PC, open a command prompt or terminal window and connect to your phone via SSH using the following command:
ssh user@IP_Address_of_the_phone
The default username for SSH is “user,” but you can verify this by running the “whoami” command on the Console app of your phone. The IP_Address_of_the_phone can be found by typing “ifconfig” in the Console app and looking for the IP of wlan0.
Step 8: Install Docker on your Android Phone
Now that you’re connected to your phone via SSH, you can easily install Docker by running the following commands:
sudo apk add docker
sudo service docker start
sudo rc-update add docker default
For the newer versions of Postmarketos you may need to run those commands instead the ones before:
  sudo apk add docker
sudo systemctl start docker
sudo systemctl enable docker
sudo systemctl status docker
To verify that Docker is installed correctly, run:
sudo docker ps
DONE! Run Docker Containers
With Docker successfully installed on your Android phone, you can now run Docker containers and use your phone as a home server. Let’s try running the Portainer container as an example:
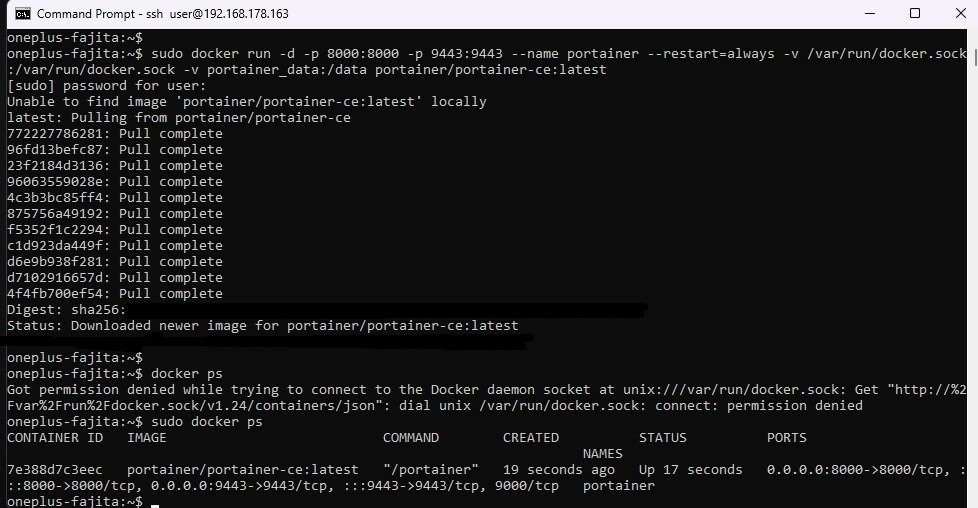
Run the following command to start the Portainer container which will download the Portainer image and start the container.:
sudo docker run -d -p 8000:8000 -p 9443:9443 --name portainer --restart=always -v /var/run/docker.sock:/var/run/docker.sock -v portainer_data:/data portainer/portainer-ce:latest
Portainer provides a web-based interface for managing Docker containers and it is easy to use.
Access Portainer Interface
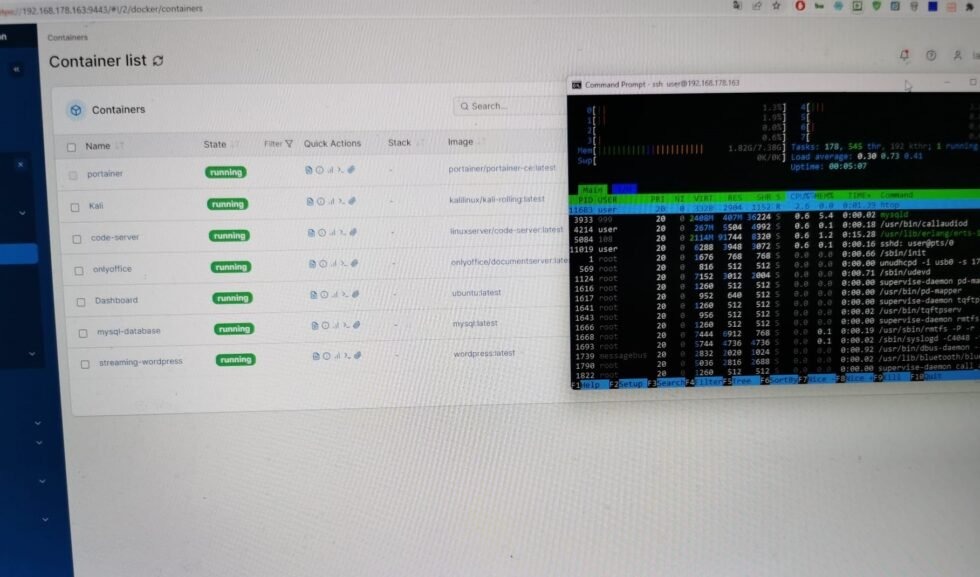
Open your web browser on your PC and type in the IP_Address_of_the_phone, followed by “:9443”. This will take you to the Portainer interface running on your Android phone. You can now manage and monitor your Docker containers through this interface.
Congratulations! You have successfully installed Docker on your Android phone and set up a Docker container. You can now explore various Docker images and run them on your phone to expand its capabilities as a home server.
I am currently using several containers on my home server, and if you’re interested, in the picture below you will see the memory usage.
This method serves as an excellent alternative to Raspberry Pi. While I haven’t personally tried a Raspberry Pi before, I believe this phone is more capable, with the added advantage of an integrated screen and battery, which are not available with a Raspberry Pi.
Downsides of OnePlus 6T as a Home Server
- No Ethernet Support: The server relies entirely on Wi-Fi, which may lack the stability and speed of Ethernet.
- No External Drive Support: Storage is limited to internal memory (256GB), making it unsuitable for large-scale storage tasks. However, you can connect to an external NAS for additional storage.